

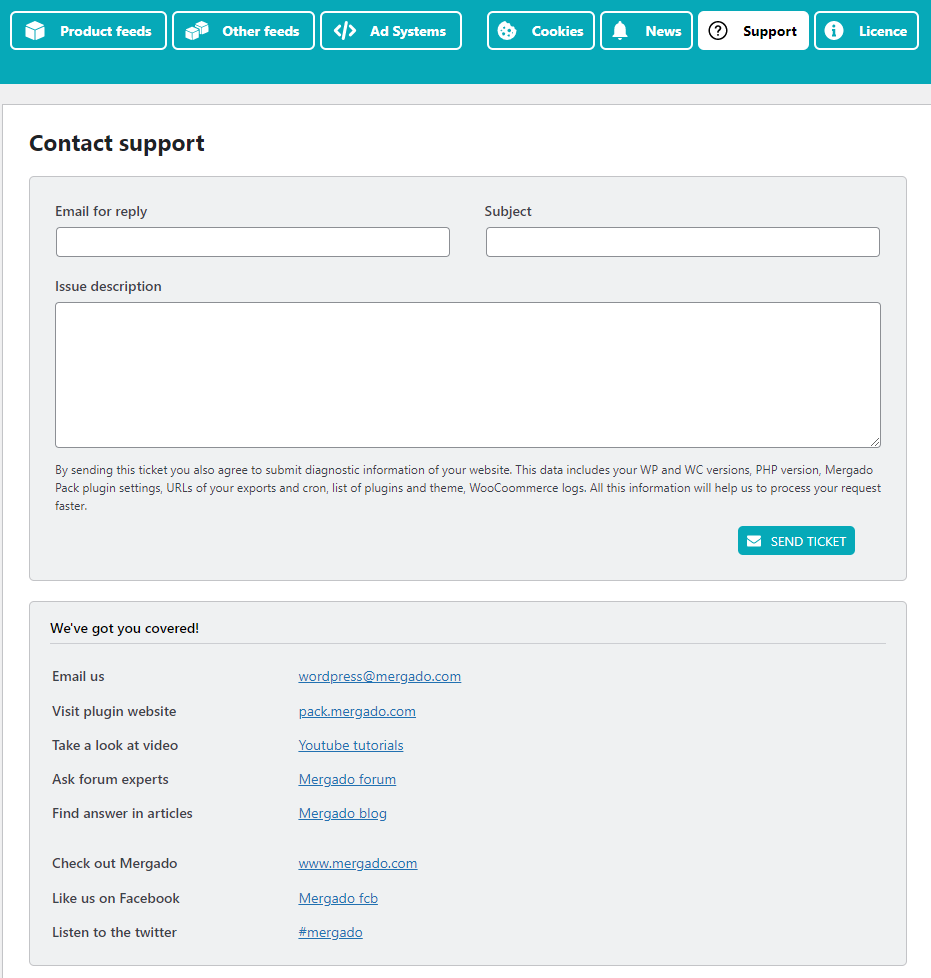
Contact form
Official platform support
Mergado Pack WordPress.org plugin support
Get supportDevelopment and technical support of the Mergado Pack for OpenCart has been stopped. We will no longer develop or provide technical support for the module.
Frequently Asked Question
General questions
-
For the WooCommerce Mergado Pack, you can download it classically from the plugin directory in the administration of your WordPress site or from the WordPress.org repository. Just search Mergado Pack.
If you download the plugin manually from the repository, go to Plugins -> Plugin Installation in the WordPress administration. Click on Upload plugin in the top left. -
For OpenCart, download the module from the official OpenCart Marketplace directory. Search for the Mergado Pack.
After downloading the installation package, go to the Extensions -> Installer page in the OpenCart administration and upload the installation package. After that, modifications still need to be applied. Go to the Extensions -> Modifications and click the Refresh button on the top right.
You can also watch youtube tutorial how to install extension to OpenCart 3.x. -
You can download the module for PrestaShop from our website pack.mergado.cz/prestashop.
After downloading the installation package, go to the PrestaShop administration page Modules -> Module manager. Click the Upload Module button at the top right and upload the installation package. The installation will take place automatically.
The module is for free.
Yes, the module needs to be configured to work properly.
Export settings:
If you are using the module for PrestaShop or WooCommerce version 3 or higher, no special settings are needed. A simple wizard will guide you through generating the feed.
If you are using an older version or OpenCart module, follow the instructions in the Export XML feeds FAQ section
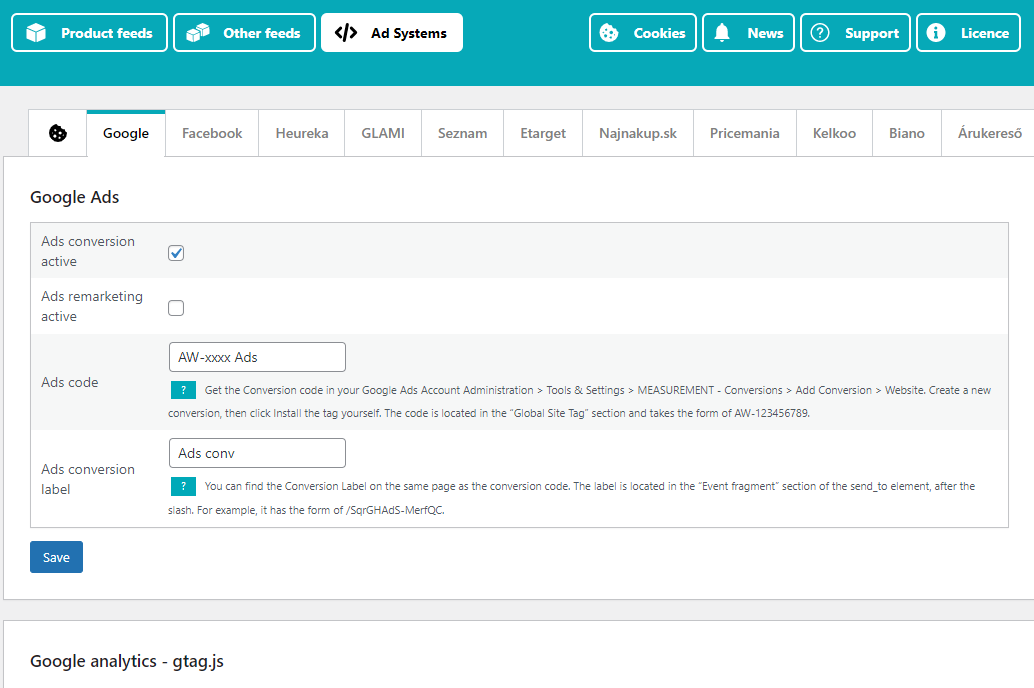
Ad Systems:
To set up Ad Systems, you need to fill in the appropriate API keys or IDs and activate the features.
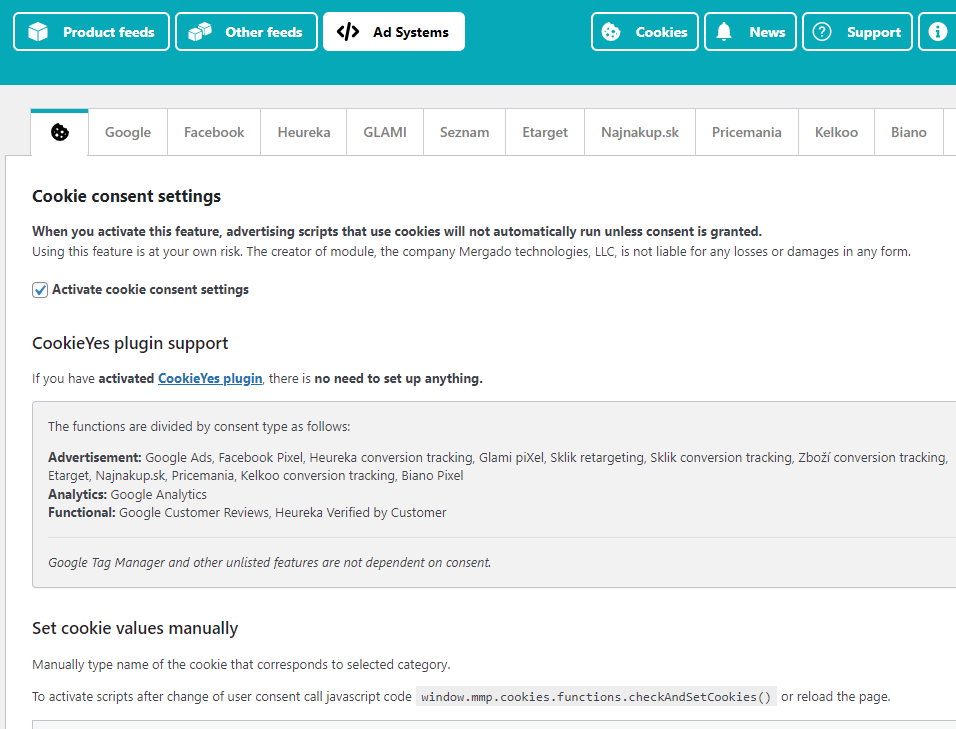
Cookies:
If you need to execute ad scripts based on the consent of the site visitor, activate the Cookie consent settings feature and follow the instructions in the Cookies FAQ section.
If you have any problems with the installation or initial setup of the module, please contact our technical support on the Support page or at mergado@mergado.com.
The module allows you to export data from your online store in XML format, in Mergado XML specification. Such data can be used to connect your store to Mergado, where you are able to convert your product data to hundreds of different formats for comparison shopping services such as Google Shopping, GLAMI, etc., or for advertising systems like Google Ads, Facebook, or for different eCommerce solutions, e. g. Shoptet, etc.
In addition, the Mergado Pack plugin is equipped with many marketing features to help you improve your advertising. Integrated support for Google Analytics, Facebook Pixel, GLAMI piXel, Heureka and much more.
WooCommerce
Yes.
The WooCommerce plugin generates SKU values in the <PRODUCTNO> element.
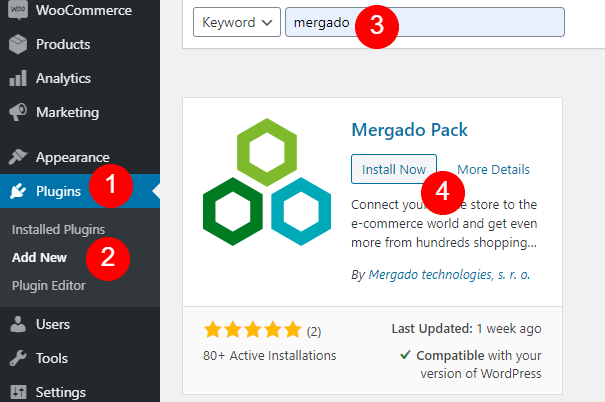
You can add the plugin to your e‑shop in the standard way from the plugin directory in the administration of your WordPress site or from the WordPress.org repository. Just look for the Mergado Pack. Above you will also find a link to download the module manually.
In the store administration, go to the Plugins -> Add new tab and search for Mergado.
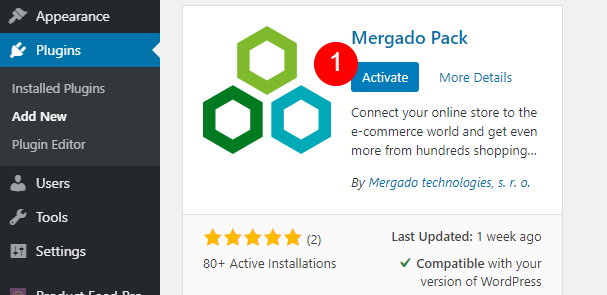
After successfully uploading the plugin, click on the Activate plugin button.
The Mergado Pack plugin for WooCommerce contains an automatic check for a new version, in which case it will display a notification in the administration (in the Menu → Plugins). After installing the plugin, you will always find out if a newer version with new features is available.
Cron is a scheduled task on your server, so it is usually set up on the web hosting of your ecommerce store.
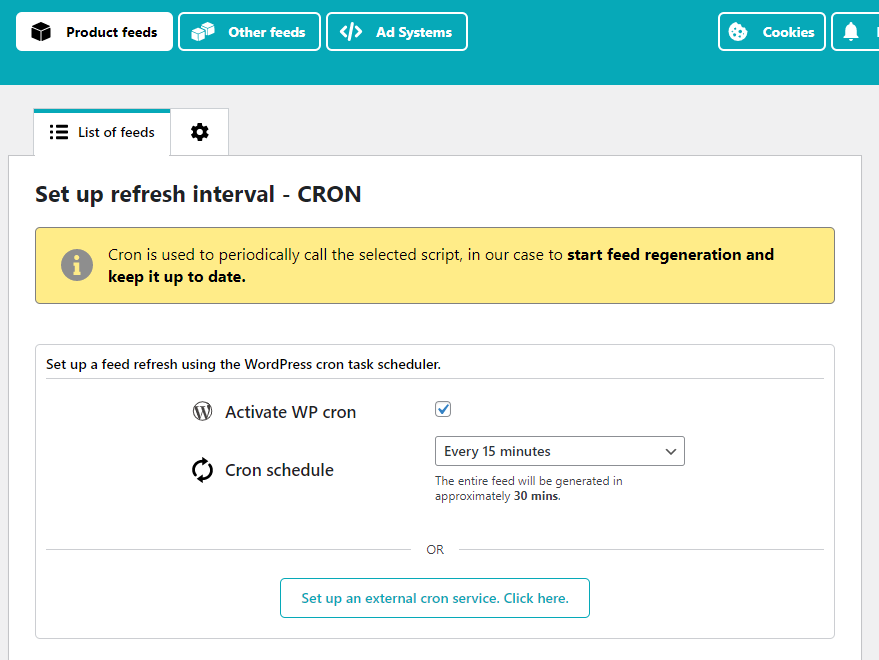
WP Cron are actions that are executed when loading WordPress sites. Every time the website loads, the tasks for WP Cron are checked. It doesn’t matter if you are in administration or on the frontend. Each time a visitor loads a page, WordPress checks to see if any action should have been taken.
However, it is generally not recommended to use WP Cron, which can affect the speed of WordPress Sites, especially for low-traffic sites.
PrestaShop
Yes. This module is designed for PrestaShop versions 1.6+ and 1.7+
We recommend the same minimum system requirements as PrestaShop. The latest stable version of PrestaShop, minimum PHP version 7.1+ for both versions PrestaShop 1.6 and 1.7.
- System: Unix, Linux or Windows.
- Web server: Apache Web Server 2.2 or any later version.
- PHP: Minimum PHP 7.1 or later. See the compatibility chart on link below for more details.
- MySQL: 5.6 minimum, a recent version is recommended.
- Server RAM: The more the merrier. We recommend setting the memory allocation per script (
memory_limit) to a minimum of256M
See the system requirements in PrestaShop DevDocs.
OpenCart
The installation process is standard, as is common with OpenCart modules.
- At the pack.mergado.cm/opencart website, download the module Mergado Pack.
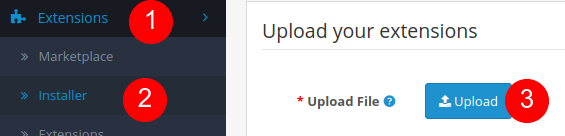
- Let’s go to the OpenCart administration. In the left menu, select the Installer from the Extensions menu. Here, click the Upload button, upload the file you previously downloaded from the web, and complete the installation.

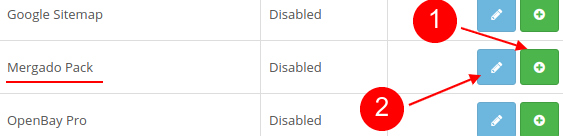
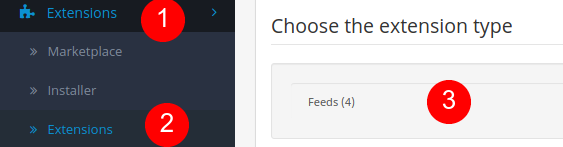
- Then, in the Extensions menu, select the Extensions category and select Feeds as the extension type in the filters.

- Here, select Mergado Pack and install it by clicking on the green Install button. Then click on the button with the pencil symbol and on the first tab Settings in Mergado Pack, activate. To save this setting, click the floppy disk button in the upper right corner of the screen.
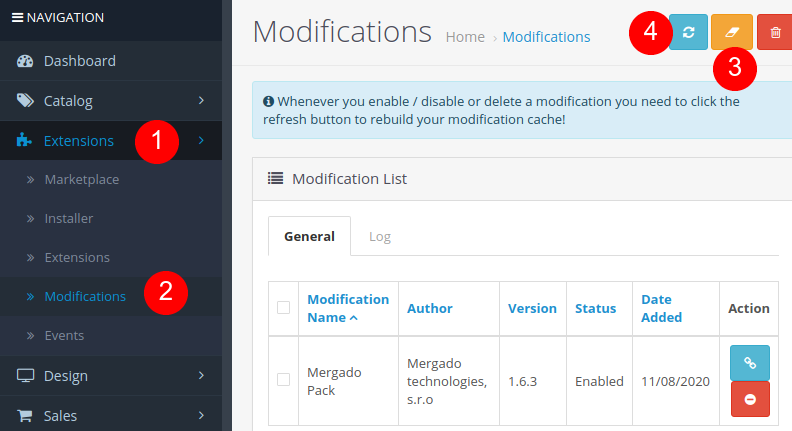
- To see the extension in the left menu and get easy access to it, in the Modifications section, click on the orange button to clear the cache. After clicking on the blue Refresh button, the Mergado module will appear in the left menu.


Mergado Pack is designed for OpenCart version 3+ and higher.
If a new version of the module is available, a notification will appear in the administration. Please download the new version of the extension from the Mergado Pack OpenCart page and update using the same procedure as for installing extensions.
The extension allows you to export data from your online store in XML format, in Mergado XML specification. Such data can be used to connect your store to Mergado, where you are able to convert your product data to hundreds of different formats for comparison shopping services such as Google Shopping, GLAMI, etc., or for advertising systems like Google Ads, Facebook, or for different eCommerce solutions, e. g. Shoptet, etc.
In addition, the Mergado Pack plugin is equipped with many marketing features to help you improve your advertising. Integrated support for Google Analytics, Facebook Pixel, GLAMI piXel, Heureka and much more.
Export XML feeds
If you are using the module for PrestaShop or WooCommerce version 3 or higher, no special settings are needed. A simple wizard will guide you through generating the feed.
If you are using an older version or OpenCart module, follow the instructions:
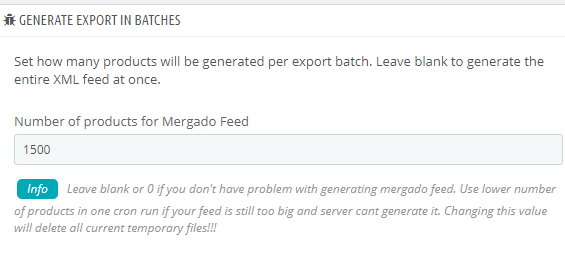
- First, go to the Settings tab. If you have a large number of products or problems with feed generation in general, choose a limit in Settings and the product exports will be generated in batches.
Batch export settings
- For WooCommerce only - If you use multiple tax rates at the same time (e.g. for different countries) select which rate will be used in the XML feed.

Setting the tax rate in the feed - In the second menu item, you set up Cron tasks. Here you will find a list of Cron URLs that you can copy and paste into the task scheduler.
More about cron jobs in our article.
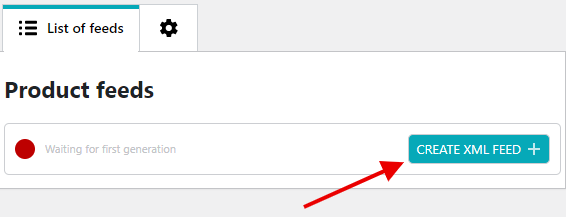
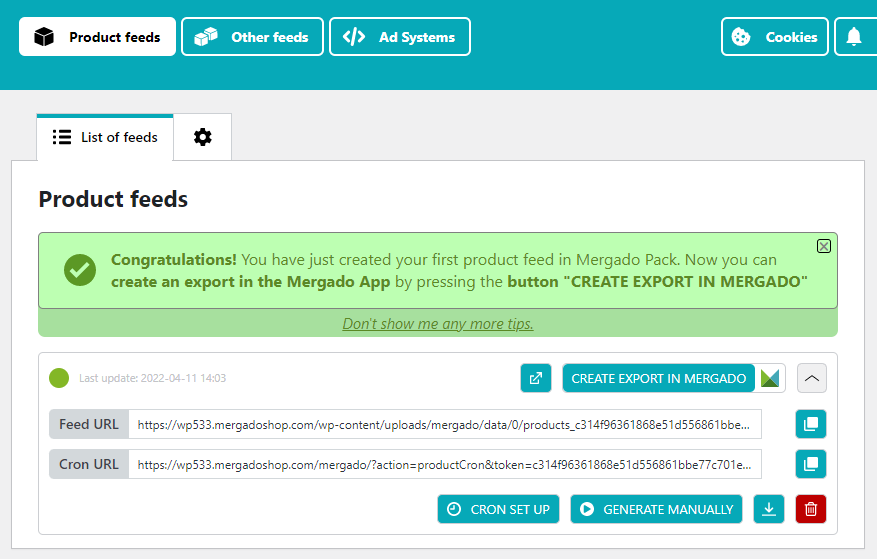
To generate a feed for the first time, you must first click the “Manually generate a feed” button (PrestaShop).

For WooCommerce only - You can also use the internal WP cron and set up feed re-generation directly in the Mergado Pack administration.
- Then in the XML feeds tab you will find a list of feeds generated at least once. On this page you can further work with the feeds, delete them, copy them and use them in Mergado Editor, download them or check the progress of the generation.
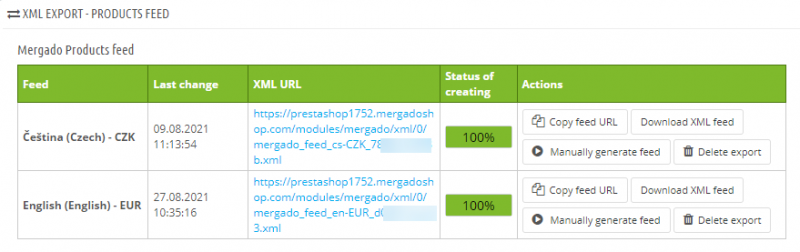
List of generated feeds


Yes.
The WooCommerce plugin generates SKU values in the <PRODUCTNO> element.
Yes, the export generates the number of items in stock in the element <STOCK_QUANTITY>.
Gradual regeneration of exports brings important improvements in their creation. With a large amount of data, problems arose and in some cases the whole process ended in failure. Our Mergado Pack therefore offers the option of choosing the number of products that will be generated in one step. And thanks to the limit, only the number of items that the user chooses is subsequently created. This speeds up the process, stabilizes it and reduces the risk of it falling.
In practice, this means that the feed is generated in partial files, which are merged after this process and create a complete XML feed.
Cron is simply an automatic task launcher, so it can, for example, start generating an product XML feed from your e‑shop at regular times. Cron can be set up at your web hosting. About cron settings, it is necessary to log in to the administration of your web hosting and find the cron settings there, or contact your web host for more information.
More about cron in our article.
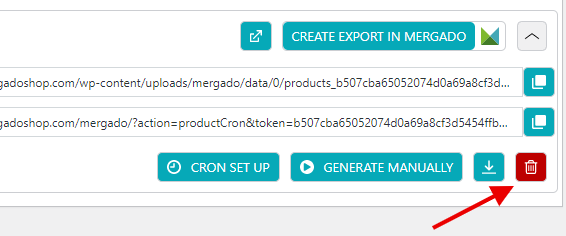
- First try to delete the feed and manually generate it again. If the problem persists, try repeating the process several times.

- If the error persists, please contact us using the contact form in the plugin administration or contact form on the Support page or email wordpress@mergado.com. Please attach as much information as possible to your email. Your CMS version, PHP version, Mergado Pack module version and other information that will help us determine the cause of the error.

Check Export Settings
Go to Export Settings (Sprocket tab) and check if you have the correct export settings checked according to visibility. By default, products are listed in Public visibility and in the catalog Shop and search results.

Delete and re-generate feed
- First try to delete the feed and re-generate it manually. If the problem persists, try repeating the process several times.
If the error persists, please contact us using the contact form in the plugin administration or on the Support page or via email wordpress@mergado.cz. Please attach as much information as possible to your email. Your CMS version, PHP version, Mergado Pack module version and other information that will help us determine the cause of the error.
Cookies
If you use a plugin (“cookie bar”) to collect consent to store cookies, which stores information about the consent status in the visitor’s browser cookies, you can use our built-in function.
The function is available for modules:
- Mergado Pack for PrestaShop
- Mergado Pack for WooCommerce
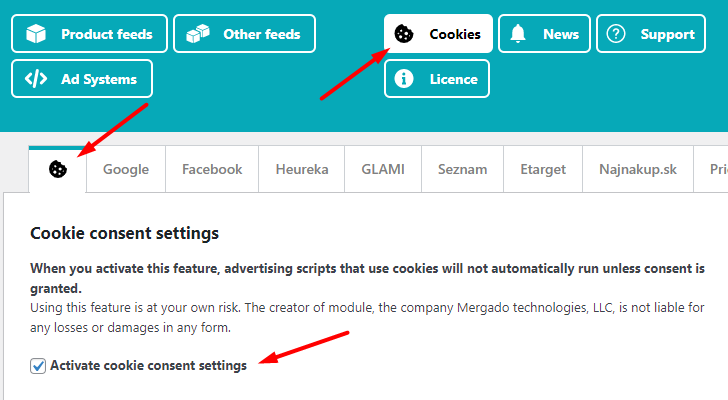
- First you need to activate the Cookie consent settings in the module administration.

- Then you must enter the names of the cookies that store information about the consent status of a particular category in the Set cookie values manually section.
For example, if the plugin stores the consent status for Advertising cookies in the “DmCookiesMarketing” cookie, this name must be written in the appropriate field.

- The Ad Scripts will modify their behaviour based on the consent given when the page is reloaded.
Or you can call the javascript functionwindow.mmp.cookies.functions.checkAndSetCookies()after the visitor’s consent has been updated. Requires developer intervention.

Read our article ePrivacy Cookies 2022 and Mergado Pack.
Yes. If you are using the following plugins/modules to collect consent to use cookies (“cookie bars”), you only need to activate the Cookie Settings in the Mergado Pack administration and then you do not need to set anything else.
Mergado Pack for WooCommerce:
Mergado Pack for PrestaShop:
Read our article ePrivacy Cookies 2022 a Mergado Pack.
To be able to use the cookies of the individual functions of the Mergado Pack plugin according to the type of consent granted, we have divided them into categories as follows:
The functions are divided by consent type as follows:
- Advertisement: Google Ads, Facebook Pixel, Heureka conversion tracking, Glami piXel, Sklik retargeting, Sklik conversion tracking, Zboží conversion tracking, Etarget, Najnakup.sk, Pricemania, Kelkoo conversion tracking, Biano Pixel
- Analytics: Google Analytics
- Functional: Google Customer Reviews, Heureka Verified by Customer
Google Tag Manager and other unlisted features are not dependent on consent.
Read our article ePrivacy Cookies 2022 and Mergado Pack.
Heureka
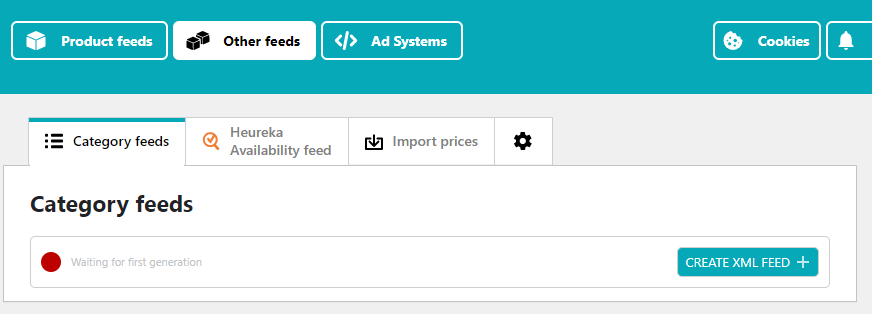
You can generate the availability feed in the WooCommerce and PrestaShop modules.
-
In the module, go to Ad Systems -> Heureka. In the Heureka : Other settings section, activate the Availability feed.
-
Then on the XML feeds page, generate the Availability feed. Follow the same procedure as for generating a Product feed.
Biano
The Biano Button cannot be directly activated in the Mergado Pack plugin.
But we have prepared a tutorial How to set up the Button using Mergado Pack and Google Tag Manager.
In Mergado Pack administration > Ad systems > Biano. In Biano Star > Edit consent to the questionnaire you can change the text for each active language of your store.
Yes.
Within the Biano Pixel settings, you can also activate the Biano Star function. Biano Star is dependent on Biano Pixel. You must have both Pixel and Star active.
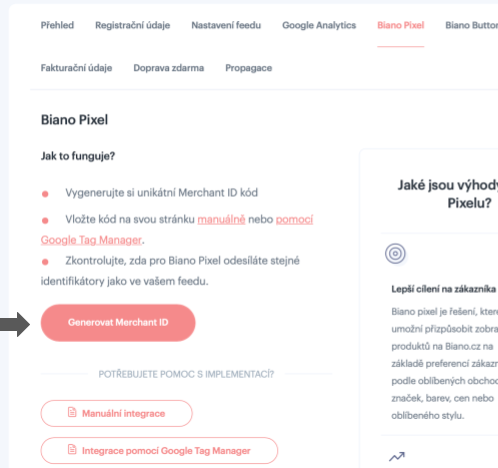
You can generate a Merchant ID in the Biano administration on the Settings > Biano Pixel page.
GLAMI piXel and TOP
To protect emails sent from your domain, add the following entry to your SPF record: _emailing.glami.cz
Example: if your domain has an SPF record of the form v=spf1 ip4:1.2.3.4 ‑all, then the modified version will be v=spf1 ip4:1.2.3.4 include:_emailing.glami.cz ‑all
All outgoing emails from GLAMI are signed with the DKIM key. Create a subdomain glami-review._domainkey to your domain with a DNS CNAME record pointing to partner-review._domainkey.glami.cz
Some hosting providers require a period at the end of the record. Example: glami-review._domainkey.glami.cz.
You can verify the correct email settings in the partner administration in the GLAMI TOP -> Settings tab, where you will see the SPF and DKIM status, marked as “Verified” in case of correct settings and “Unverified” in case of error.
If you are not sure how to complete these steps, contact your webmaster.
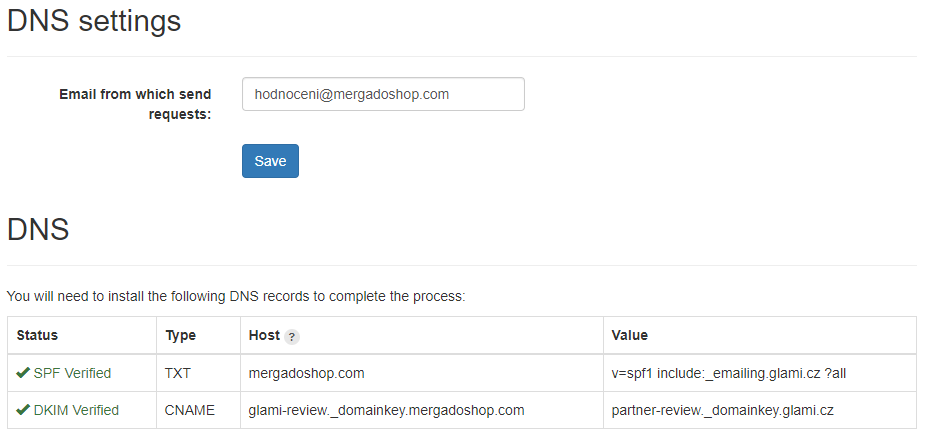
In order to successfully set up the email sending system, you need to complete two steps:
- In the GLAMI partner administration, under GLAMI TOP -> Settings, set up an email from which GLAMI will send customer emails with the questionnaire. This email should have the same domain as your e‑shop. For example, www.shop.cz will have the email reviews@shop.cz.
- Change the DNS settings for your site’s domain (this is the same domain you used to send the emails from step 1) as instructed below. This setting is important so that emails end up in your customers inbox and not in their SPAM folder.
Your piXel API key can be found in the GLAMI administration > GLAMI piXel page > Glami piXel implementation guide for developers. On the page, scroll down to the Glami piXel code for YOUR WEBSITE section.
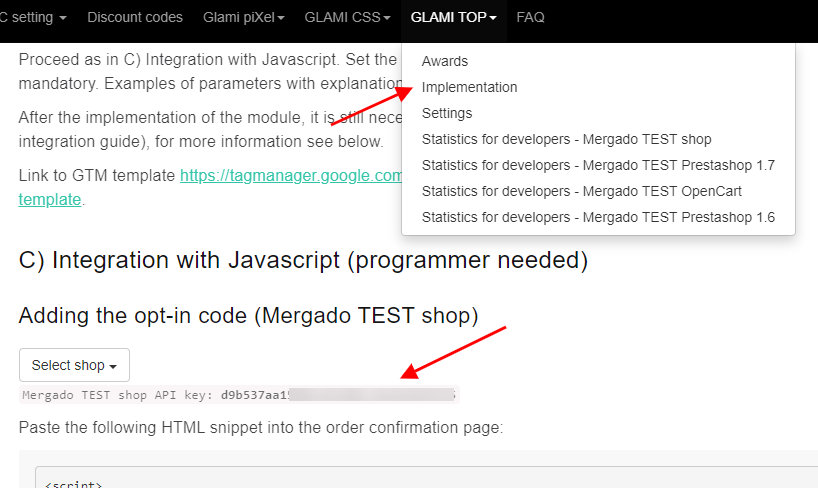
Your piXel API key can be found in the GLAMI administration > GLAMI TOP page > Implementation guide for developers. On the page, scroll down to section C) Integration with Javascript (programmer needed).
Árukereső
Árukereső sends emails on behalf of your email address used during registration. To send emails correctly, it is advisable to set up Sender Policy Framework (SPF) on your domain. Some email servers may verify the origin of the sender and your review requests could end up in SPAM.
Árukereső recommends adding an SPF record to your domain’s DNS TXT for their server ‘_spf‑c.arukereso.hu’.
If for some reason you are unable to edit the DNS SPF records, Árukereső recommends that you notify info@arukereso.hu. Emails with questionnaires will be sent from megbizhatobolt@arukereso.hu.
In the administration Árukereső in the tab Beállítások -> Véleménybekérő levelek kiküldési idejének módosítása you can change the number of days from the order until the email is sent to the customer.
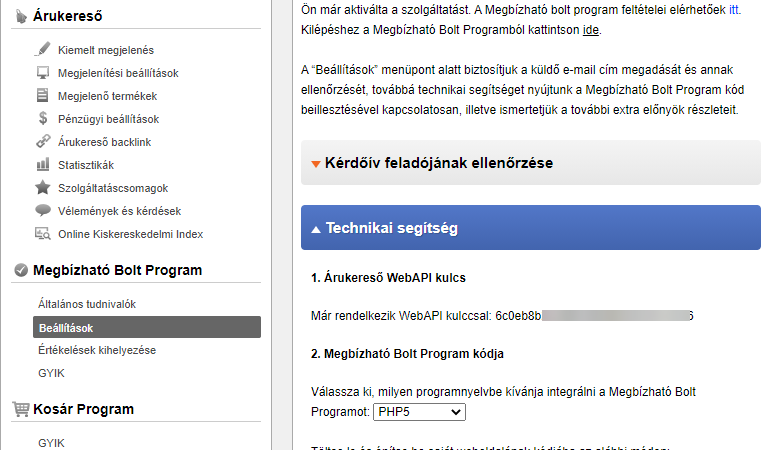
Your WebAPI key can be found in the Arukereso administration on the Beállítások > Technikai segítség tab
You can customize the consent text for each active language in your ecommerce website. Go to the module administration on the Ad Systems > Árukereső tab.
Google Analytics
Yes, Google Analtics sends data for GA Ecommerce and Enhanced Ecommerce statistics. However, you must first activate both of these features in the Mergado Pack settings and then in Google Analytics.
Yes, it does. The name of the variable is currencyCode.
More about measuring a multi-currency online store in article Multi-Currency Ecommerce Tracking in Google Analytics with GTM.
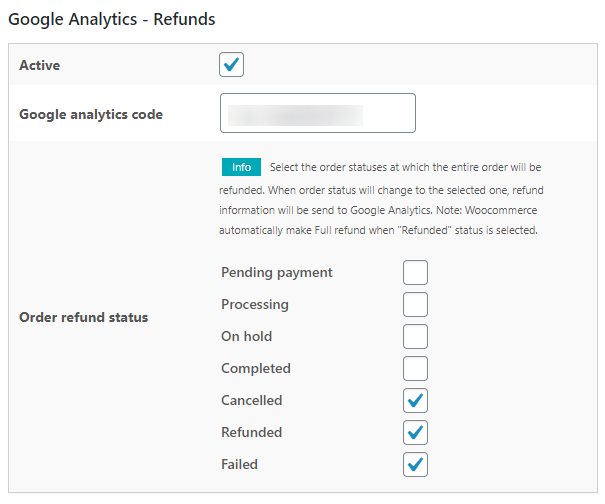
In the plugin administration enable the feature at Advertising Systems > Google > Google Analytics Refund section. Fill in your Google Analytics tracking ID and choose which order statuses use for refund. When order status will change to the selected one, refund information will be send to Google Analytics.
The refund will be sent to GA in the full amount of the order.
A user views details for a product — view_item
A user views a list of one or more products — view_item_list
A user clicks on a product or product link — select_content
A user adds one or more products to a shopping cart — add_to_cart
A user removes one or more products from a shopping cart — remove_from_cart
A user initiates the checkout process for one or more products — begin_checkout
Complete the payment method selection step — set_checkout_option ( payment method )
Complete the shipping method selection step — set_checkout_option ( shipping method )
A user completes a purchase — purchase
Google Analytics 4
Yes.
Google Analytics 4 support modules for PrestaShop and WordPress + WooCommerce
Within the GA4 settings, you can choose whether to send item prices, discounts and shipping cost including or excluding tax.
This setting will affect the values of these parameters:
- shipping
- discount
- price
This setting does not affect total revenue. The total revenue of the transaction is calculated including taxes and shipping costs according to the Google Analytics 4 specification.
https://developers.google.com/analytics/devguides/collection/ga4/reference/events#purchase
In addition to the basic events sent by the script, the module sends additional events to monitor ecommerce.
The module respects this specification https://developers.google.com/analytics/devguides/collection/ga4/reference/events. However, it does not support all available parameters.
List of events:
- select_item (when select a specific product or its variant)
- view_item_list (view a list of products, for example a category page)
- view_cart
- add_to_cart
- remove_from_cart
- add_shipping_info (edit shipping method)
- add_payment_info (edit payment method)
- begin_checkout (when going to Checkout from any page)
- purchase
- refund (in the module administration you can set at which order statuses a refund will be sent to GA)
Definition of parameters containing monetary values:
- value — corresponds to the total value of the purchase, including shipping, tax and the sum of all items after discount.
- tax — the total value of taxes associated with the purchase
For the following parameters you can choose whether they will be sent including or excluding tax in the module deployment.
- shipping — total shipping cost
- discount — the amount of discount per one item
- price — price per one item
Google Ads
A user completes a purchase — conversion (conversion + remarketing script)
A user adds one or more products to a shopping cart — add_to_cart (remarketing)
A user views details for a product — view_item (remarketing)
A user views a list of one or more products — view_item_list (remarketing)
Google Tag Manager
Yes, the implementation of GTM via Mergado Pack includes a data layer. The specification is the same as the Enhanced Ecommerce Google Analytics. Enhanced Ecommerce (UA) Developer Guide specification.
Mergado Pack video Introduction


Blog

Creation and optimization of Google Shopping feed for your online store on WooCommerce
In the ImperialMedia advertising and digital agency, we have been creating online stores and follow-up marketing for several years. One of the effective ways of promotion is advertising products on Google Shopping. However, in order to advertise products on this channel, we need to create a properly structured XML feed with as much detailed product information as possible.
Mergado Pack for WooCommerce will now help you collect reviews for Biano Star
Many users are skeptical to buy furniture online. When they can’t see it for themselves, reviews from other customers often help them choose. Such a function was introduced in 2021 by Biano.

Mergado Pack v. 3 for PrestaShop simplifies many advertising operations
Easier feed creation, generation in batches, and the option of pre-filling the input feed and format. These are the top new features that online store operators can use in the Mergado plugin for PrestaShop.